Quinoa & Vegetable Salad

I’m feeling quite guilty about the prolonged absence from my blog, but after several eventful months I’m back! Let’s see – since I last posted I changed jobs, moved and got married. Quite crazy I must say! Now that I’m settling back into a routine, I’m back in the kitchen and focusing on new dishes with a healthy twist.

This lazy Sunday afternoon I assembled a vegetable, quinoa salad. It’s perfect for a light lunch or side dish. There are 3 components – quinoa, dressing and vegetables. Lime and vinegar brighten up the dressing and crunchy peppers add a nice texture. Check this recipe out!

IMG_1933

Quinoa

3/4 cups quinoa (red or golden)

1 1/2 teaspoon extra virgin olive oil

1 teaspoon ground cumin

1 1/4 cup water

Directions: Rinse the quinoa and drain. Heat olive oil in a saucepan and toast the quinoa for about 8 minutes. Add the cumin and toast for another 3 minutes. Add 1 1/4 cups of water to the quinoa and bring to a boil. Cover and reduce to a simmer. Cook for 15-20 minutes until the water is absorbed and quinoa is tender. Remove from heat and remove lid.

IMG_1919

Dressing

2 tablespoons extra virgin olive oil

2 teaspoons red wine vinegar

1/4 cup fresh lime juice

1 teaspoon finely chopped jalapeño pepper (remove seeds)

1 minced garlic clove

1/2 teaspoon garlic salt

1/4 teaspoon of black pepper

Directions: Make a quick dressing. Whisk olive oil, vinegar, lime juice, pepper, garlic, salt and pepper in a large bowl. And warm quinoa to dressing and stir to coat. Set aside.

IMG_1923

Vegetable Salad

1/2 cup corn

3/4 cup diced red pepper

3/4 cup quartered cherry tomatoes

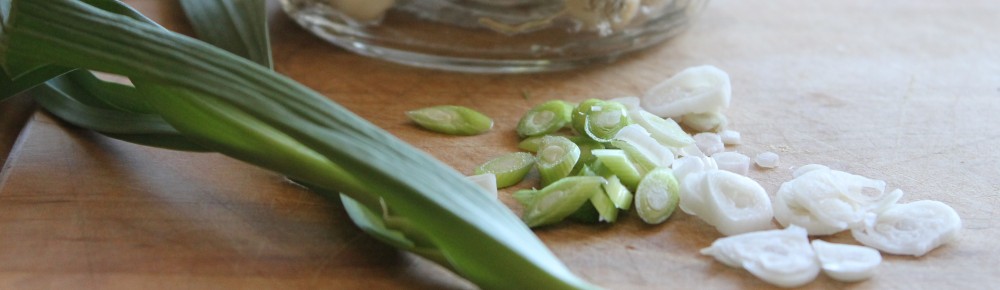
1/3 cup sliced scallions

1/4 cup chopped cilantro

1/2 cup black beans

drizzle of olive oil and red wine vinegar

Directions: Mix the above ingredients and add to the cooled quinoa mixture. Let rest at room temperature or in the refrigerator for at least a couple hours for the flavors to meld.

Enjoy!

IMG_1930

Summer Breakfast Sandwich

We’ve had more corn and tomatoes this summer than I know what to do with! My most recent creation was a breakfast sandwich with a corn and tomato salsa. This is a hearty and tasty sandwich that’ll keep you full for hours.

Whip up a tomato/corn salsa. Toss diced tomatoes, corn, basil, crumbled queso fresco, garlic salt and pepper in a bowl.

Toast a sliced baguette in the oven and melt provolone on one side of the bread. Rub a garlic clove on the other side of the bread when it comes out of the oven.

Fry a couple eggs over easy. Assemble the sandwich by placing the fried eggs on the bread and top with the salsa. Enjoy!


Zucchini Patties

Zucchini is a big hit in our kitchen. Zucchini bread, stuffed zucchini, zucchini gratin … you name it, we’ll devour it! Tonight I wanted to try a new zucchini side dish to go alongside a rotisserie chicken I picked up after work. I found a simple, fast, and healthy recipe online for zucchini cakes. They were a great accompaniment to the chicken.

I grated a large zucchini finely with my box grater. I squeezed the water out of the zucchini like the recipe suggested, which helped the mixture bind together nicely without being too watery.

Recipe: (4 patties) Recipe adapted from a blog called Life’s Ambrosia.  http://www.lifesambrosia.com/2009/02/zucchini-cakes-recipe.html

1 large zucchini (grate as finely as possible with box grater, wrap zucchini in a couple paper towels and squeeze out excess water)

1/3 cup crumbled queso fresco cheese (or parmesan cheese)

3/4 cup panko bread crumbs

1/4 teaspoon chili powder

1 clove garlic, minced

1 egg

salt and pepper to taste

1 tablespoon olive oil (for pan)

Pre-heat a pan over medium heat. In a bowl mix all ingredients together, excluding olive oil. Add olive oil to pan. Using a large ice cream scoop, scoop 4 patties into the heated pan. Cook until golden on each side, 3-4 minutes per side. Serve with sour cream. Enjoy 🙂

Sungold Tomato Bruschetta

Tomato season is in high gear right now! That translates into caprese salads and lots of tomato bruschetta in my kitchen.

This weekend I harvested some sungold tomatoes that were as sweet as candy. This particular sungold plant has a story. My mom planted a seed back in February when snow was still falling to the ground. She raised the seedling under a greenhouse light. Once it was a couple months old, the sungold travelled 5 hours to the California bay area. It was handed off to my boyfriend’s parents who have a sunny yard, perfect for tomato plants to flourish. Right now the tomatoes are reaching their peak ripeness and let me tell you again, they are so good. Better than any tomato at the grocery store!

I decided to make a simple bruschetta with the sungold tomatoes and some other ingredients I had on hand. This is a healthy, fresh, and quick side or appetizer. I make this all the time in the summer.

Cooking Instructions:

Cut desired amount of cherry or sungold tomatoes into quarters. Chop up some cilantro and mix with tomatoes. Add a swirl each of good extra virgin olive oil and balsamic vinegar.   Add cracked pepper. Then crumble in some queso fresco cheese. Mix everything together then let sit while you prepare the bread.

Cut a baguette into slices (again, use desired amount). Lay on baking sheet and put into a preheated 350 F degree oven. Once the bread is toasted on top, flip. Let the other side toast up, then remove from oven. Rub a clove of garlic over the warm bread. Spoon tomato mixture onto bread.

Baked Sweet Potato Fries Challenge

It all started at an unassuming restaurant in North Lake Tahoe. My mom ordered a sandwich and got some sweet potato fries on the side. Now, I’m not a big fries fan. I rarely, if ever, order them. However, I decided to give these fries a try and …. They were pretty darn good! They had a crispy coating, soft interior, and a curry seasoning on the outside. I liked the natural sweetness of the potato that came through. I decided to make some at home with some sweet potatoes I picked up at the farmer’s market. I baked the fries. I’m always trying to lighten up the food I eat at home!

I found two recipes online and just couldn’t decide between them. So, I decided it was time for a (drum roll please) SWEET POTATO FRIES CHALLENGE!!

The two are very different fries, but my taste tester and I were able to decide on a winner (revealed below)!

Recipe A: savory, garlicky, crispy fry

Recipe B: sweet, dessert-like, thick, sticky-coated fry

Taste tester and I both agreed … Recipe A is the winner! We decided that since the sweet potato is already sweet, the coating (containing graham cracker crumbs, brown sugar, and cinnamon) on Recipe B resulted in an overly-sweet fry. Recipe A was a yummy balance of sweet and savory. Also, Recipe A was so crispy, which is a challenge to achieve when baking fries. Congratulations to our winner!

Recipe adapted from http://purplefoodie.com/garlicky-baked-fries/

Winning Recipe: 

3 garlic cloves, minced
3 tbsp extra virgin olive oil
2 medium sweet potatoes, cut into thin slices
1 1/2 tbsp cornstarch
1/2 tsp garlic salt
1/2 tsp freshly ground black pepper
1/4 teaspoon cumin

Preheat oven to 400° F and line a baking sheet with foil. Mix the garlic and oil in a large bowl. Put in the microwave for 30 seconds to warm up and infuse the oil with garlic essence. Coat the baking sheet with about a tablespoon of the oil so the fries won’t stick (leave the garlic in the bowl). Add the cut up sweet potatoes to the bowl with the garlic/oil mixture, toss to coat evenly. Wrap the bowl tightly in plastic wrap. Put the bowl in the microwave and cook on full power until the potatoes start to get soft, 4 to 5 minutes. Shake  the bowl halfway through cooking.

Mix the cornstarch, salt, pepper and cumin  in a small bowl. Sprinkle over the hot sweet potatoes, tossing to coat evenly. Arrange the sweet potatoes in a single layer on the baking pan and put in the oven. Cook for 20 minutes, use a spatula to turn the fries over on the pan. Cook an additional 10 minutes or until the fries are crispy and start turning brown. Serve immediately with ketchup or a dipping sauce of your choice.

Cherry Season is here

Yay for cherry season! In northern California, cherries can be found at any grocery store or farmer’s market right now. I like the deep red, juicy, sweet bing cherries. They are so delicious! I’ve been putting them over greek yogurt for breakfast and eating them for an afternoon snack. These cherries also bake up nicely, so I decided to make a dessert. I contemplated making either a cobbler or a crisp. I settled on a crisp. I just made a strawberry/rhubarb crisp a couple weeks ago, but I was still craving that oatmeal, brown sugar, buttery topping! The cherries baked down and released a rich, syrupy juice, but still maintained their shape. Perfect for a crisp filling!

I bought a cherry pitter for about $10. I think it’s worth it, it saves a lot of labor and effort! It’s kind of fun to use too.

I used the same recipe as the strawberry/rhubarb crisp. I simply replaced the strawberry and rhubarb with fresh, pitted bing cherries.

https://chicknhen.wordpress.com/2012/05/30/strawberry-rhubarb-crisp/ 

Bok Choy, Chives and Garlic Never Looked so Good

Today’s post is all about my mom’s garden. She has been whipping up some beautiful seasonal dishes using homegrown and fresh ingredients. This week she harvested an abundance of young garlic, chives, and bok choy.

Young Garlic: You can look for young garlic at the farmer’s markets…..it’s kind of the latest rage and marketed as “green garlic”. My mom has it growing everywhere in the garden, and usually has to dig it out to make room for other crops. She uses young bulbs in everything. They’re kind of sweet, like onions, but have a garlicky kick. You can use a lot of young garlic without overpowering a dish with too much garlic essence.

Young Garlic

Chives: Chives provide a subtle onion flavor and you can use them to garnish all sorts of dishes like potato salad, soups, pastas, omelets, etc. Be creative! My mom uses all parts of the chive plant including the flowers, which are so aesthetically pleasing. During the summer she dries snipped chives and chive flowers for winter use. That way she can have chives anytime of the year.

Chives and Chive Flowers

Bok Choy: Bok choy is a cabbage and is seen a lot in Chinese cuisine. Bok Choy flourishes in my mom’s garden and she uses it to make simple vegetable side dishes.

Bok Choy earlier in the Spring, ready for planting. How’d that chick get in the picture?

My mom incorporated the three ingredients that we’ve mentioned from the garden into a healthy and beautiful side dish.

Ingredients being prepped on a cutting board

Bok Choy with Young Garlic, Chives, and Chive Flowers

Recipe:

Chop bok choy, young garlic, and chives (cut bok choy in 1″ pieces, slice garlic thinly, chop chives and chive flowers)

Put a saute pan on medium heat. Once pan is hot, coat the bottom with sesame oil. Add bok choy and garlic. Saute until tender. Then add chives with flowers, some red pepper flakes, and a splash of soy sauce. Serve and garnish with more chives and chives flowers.

Farmer’s Market Roasted Vegetables

This weekend I was at the Farmer’s Market perusing the local produce. I decided on some zucchini, asparagus, and a red bell pepper and it only cost me a couple dollars!

Now it’s Monday. Weeknights are all about whipping dinner out quickly. I can usually get dinner on the table within 30 minutes of kicking off my shoes at the front door. It’s definitely not fine dining, but I go for healthy, fresh, fast meals. Tonight I simply roasted the vegetables from the market.

I cranked the oven to 400 degrees F. I cut the pepper and zucchini into similar sized pieces and tossed with some olive oil. I trimmed the asparagus (make sure to snap off the tough ends) and also tossed them in olive oil. On they went to a roasting pan covered in aluminum foil. I sprinkled salt and pepper over the veggies and popped them into the oven. They took about 25 minutes. I checked on them a couple times during the cooking process and gave them a nice flip with some tongs. The veggies got a swirl of good quality olive oil and some parmesan cheese when they came out of the oven.

This is a very simple and healthy side dish for any weeknight meal! Just use whatever is in season: squash, potatoes, eggplant, asparagus, tomatoes ….